30 April 2019
MySql(1)----start mysql
by Jerry Zhang
#Tip of the Day:
Install MySql
I install mysql in windows 10. I downloaded the msi file from its website. I installed it as a windows service, so it starts with Windows.
Environment Variable: There is a choice to add mysql in windows system variable when we install it. Or you can add/check it manually:
- Right click the computer icon on the desktop, choose Properties
- On the left, choose Advanced system settings, press Environment Variables.
- Under system variables, double click the
Pathvariable. Then add a new line with your installation path. The below is my path, you should change to yours.
C:\Program Files\MySQL\MySQL Server 8.0\bin
Start MySql service
I tried to use net start mysql to start mysql service, but it did not
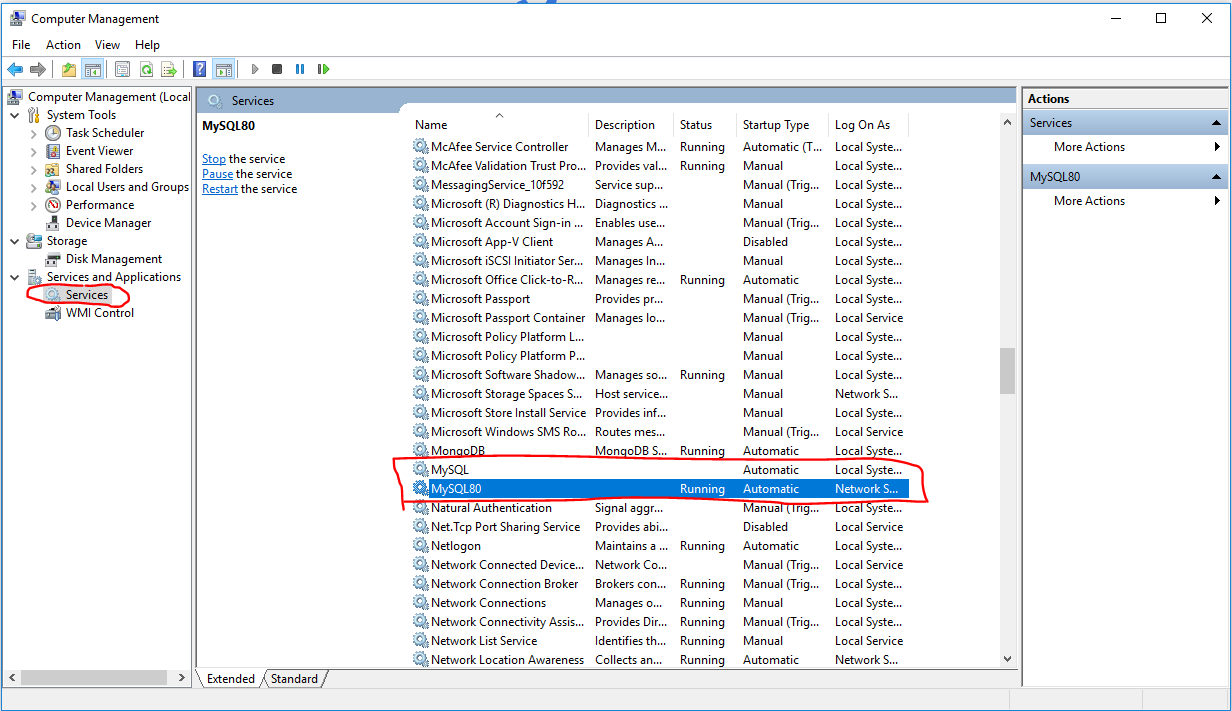
work for me. Then I use the Windows UI to check all my service.
- Right click the computer icon on the desktop, choose manage.
- Choose Services on the left side, and I found the MySQL80 is running.

Login mysql
Because we have provided an environment path for mysql, we can use mysql command in any
directory now.
Open the command line in Windows, type mysql -V. Notice that here is a Capital V!
-V means we want to check the version of mysql. It should display something like this:
mysql Ver 8.0.15 for Win64 on x86_64 (MySQL Community Server - GPL)
Then we can login mysql using the command mysql -u root -p, input the password that you
set when you installed mysql.

Now, we can start using mysql. If you want to quit, type exit; to exit mysql in command line.
Some frequently-used commands
To show the current user: SELECT USER();
To create a database: CREATE {DATABASE | SCHEMA} db_name
To display all the databases: SHOW {DATABASES | SCHEMAS}
To remove a database: DROP {DATABASE | SCHEMA} db_name